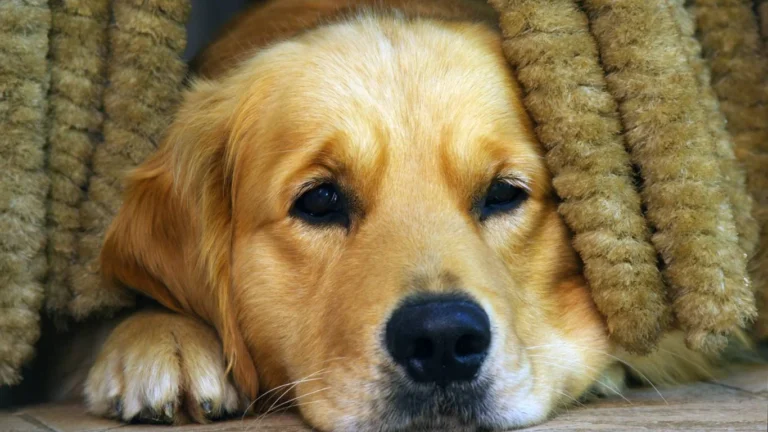
“Master How to Properly Trim a Dog’s Nails at Home with These Easy Tips”
As a pet nutritionist and expert in pet care with years of experience in veterinary clinics, I know how important it is to keep your dog healthy and happy. One aspect that many pet owners tend to overlook is the importance of trimming their dog’s nails properly. It may seem like a simple task, but it can actually be quite tricky if not done right. So, if you’re wondering how to properly trim a dog’s nails at home, you’ve come to the right place. In this guide, I’ll walk you through everything you need to know to make this task easier, safer, and less stressful for both you and your dog. Whether you’re a first-time pet owner or an experienced one, proper nail trimming is crucial for your dog’s well-being.
Why Proper Nail Care is Important for Your Dog
Nail trimming is not just about appearance; it’s essential for your dog’s health. Untrimmed nails can lead to several problems that could affect your dog’s quality of life. As someone who has worked closely with veterinarians, I can tell you firsthand that improper nail care is one of the most common issues pet owners overlook.
First, long nails can cause painful paw deformities and affect your dog’s gait. Overgrown nails put excessive pressure on the pads and bones, leading to arthritis or other joint problems down the line. Additionally, long nails are more prone to breaking or splitting, which can be quite painful and lead to infection. And let’s not forget that long nails can also get caught on carpets, furniture, or other surfaces, which increases the risk of injury.
But it’s not just about physical discomfort; nail trimming also plays a role in your dog’s mental well-being. When dogs’ nails grow too long, they may feel awkward or even anxious when walking or running. This can affect their overall confidence and behavior. Keeping their nails at a proper length helps them move comfortably, ensuring they are happy and active.
How Often Should You Trim Your Dog’s Nails?
There isn’t a one-size-fits-all answer to this question since it depends on your dog’s breed, size, and activity level. However, in general, most dogs need their nails trimmed every 3-4 weeks. If your dog is more active and spends a lot of time outdoors, their nails may naturally wear down, requiring less frequent trimming. On the other hand, dogs that spend most of their time indoors will likely need regular nail trimming to avoid the risk of overgrowth.
To determine if it’s time to trim your dog’s nails, pay attention to how they sound when your dog walks on hard surfaces like tile or wood floors. If you hear clicking, it’s probably time for a trim! Another sign is if your dog’s nails are starting to curl or touch the ground, indicating that they’ve grown too long.
Tools You’ll Need for Trimming Your Dog’s Nails
Before we dive into the step-by-step process, let’s talk about the tools you’ll need. Trimming your dog’s nails at home can be a breeze if you have the right equipment. Here’s what I recommend:
- Dog Nail Clippers: There are a few different types of clippers, including scissor-style and guillotine-style. Personally, I prefer scissor-style clippers because they give you more control and are great for larger dog nails.
- Styptic Powder or Gel: This is crucial in case you accidentally cut the quick (the sensitive part of the nail). It helps stop bleeding quickly.
- Dog Nail File: After clipping, you may want to use a file to smooth out any rough edges. This isn’t essential, but it’s a good extra step to prevent the nails from snagging on things.
- Treats: Rewards go a long way in making the experience more positive for your dog! Make sure you have some of their favorite treats on hand to reward them after each successful nail trim.
Choosing the Right Clippers for Your Dog
When selecting nail clippers, it’s essential to choose a pair that’s appropriate for your dog’s size and nail type. For example, small dogs with thinner nails may only need a simple guillotine clipper, while large dogs with thicker nails may require heavy-duty scissor-style clippers. As I mentioned earlier, scissor-style clippers are my personal favorite, especially for medium to large dogs, because they provide more control and precision. I’ve found that these clippers are much easier to use compared to guillotine-style ones, especially if you’re new to nail trimming.
How to Prepare Your Dog for a Nail Trim
Before jumping straight into trimming, it’s essential to get your dog comfortable with the process. Not every dog loves having their paws touched, so it’s important to start with a calm and patient approach. Here’s how you can prepare your dog for a stress-free nail trim:
- Get Them Used to Paw Handling: Start by gently handling your dog’s paws regularly. Massage and hold their paws for a few seconds at a time. Gradually build up their tolerance so that they associate paw handling with positive experiences.
- Make it a Positive Experience: Have some treats ready and offer them when your dog allows you to touch their paws. This will help them associate nail trimming with something enjoyable.
- Stay Calm and Relaxed: Dogs can sense our emotions, so if you’re anxious or stressed, your dog will likely pick up on that. Keep calm and positive during the process, and your dog will be more likely to stay calm too.
Start Slow: No Need to Rush!
Remember, patience is key! If your dog is nervous about the process, take it slow. You don’t have to trim all their nails in one sitting. Start by trimming just one or two nails, and then reward them with a treat and lots of praise. Over time, they’ll get used to the routine and become more comfortable with it.
Step-by-Step Guide: How to Properly Trim Your Dog’s Nails
Now that you’ve prepared yourself and your dog for the nail trimming process, let’s get down to the step-by-step details on how to actually trim your dog’s nails at home. Don’t worry—I’ll guide you through every stage, sharing tips I’ve learned over the years in veterinary clinics and from personal experience. If you follow these steps, you’ll be able to trim your dog’s nails safely, efficiently, and without causing stress for either of you.
Step 1: Get Your Dog in a Comfortable Position
The first step to a successful nail trim is getting your dog into a comfortable position. Depending on your dog’s size, you might want to have them sit or lie down on a non-slippery surface. If you have a larger dog, it may help to place them on a table or a sturdy surface where you can control their movements better. If your dog is small, you can sit on the floor with them in your lap or have them on a low table.
Make sure the environment is calm. A quiet, well-lit area with minimal distractions is ideal. If you’re using clippers with a loud sound, it might be a good idea to desensitize your dog to the noise first. Simply turn the clippers on and let them get used to the sound before you start trimming.
Step 2: Inspect Your Dog’s Nails
Before you start trimming, take a moment to inspect your dog’s nails. Check for any cracks, splits, or signs of infection. If you notice any abnormalities, it’s best to consult your veterinarian before trimming. It’s essential to ensure your dog’s nails are healthy so you don’t accidentally make any issues worse while trimming.
If everything looks good, take a closer look at each nail and figure out where the quick ends. The quick is the pinkish area inside the nail, which contains blood vessels and nerves. It’s important to avoid cutting into the quick because it can cause bleeding and discomfort. With some dogs, especially those with dark nails, it can be harder to see the quick, so it’s especially important to trim small amounts at a time.

Step 3: Hold the Nail Clippers Correctly
Now that you’re ready to begin, make sure you’re holding the nail clippers correctly. For scissor-style clippers, grip the handles with your dominant hand, and hold the blades with your other hand. Ensure that the blades are positioned in a way that the cutting edge will slice through the nail smoothly. For guillotine-style clippers, place the dog’s nail inside the opening and position the clipper so that it will trim the nail cleanly.
Make sure you have a firm yet gentle hold on your dog’s paw. You want them to feel secure, but you don’t want to squeeze too hard, which could make them uncomfortable or anxious. Hold the nail in place with your thumb and forefinger while you clip.
Step 4: Start Trimming the Nail
It’s always better to trim too little than too much, especially when you’re just starting out. Begin by cutting a small amount off the tip of the nail at a 45-degree angle. As you cut, be mindful of the quick. For dogs with clear or light-colored nails, you’ll be able to see the quick more easily, but for darker nails, it’s safer to clip off small amounts at a time until you see a small black dot in the center of the nail. This indicates that you are getting close to the quick.
If your dog has long nails or you’re trimming multiple nails, it’s a good idea to take breaks in between. This not only helps keep your dog calm but also gives you a moment to evaluate your progress and ensure you’re trimming the nails evenly.
Step 5: Deal with the Quick if You Cut It
As a pet nutritionist and pet care expert, I’ve had my fair share of nail trimming accidents. If you accidentally cut the quick and your dog starts to bleed, don’t panic. It happens! Keep some styptic powder or styptic gel on hand to quickly stop the bleeding. Apply the powder directly to the nail or dip the nail in the powder until the bleeding stops. If you don’t have styptic powder, you can also use cornstarch or a clean cloth to apply pressure to the nail until the bleeding subsides.
It’s essential to stay calm in these situations. Your dog will likely be startled, but if you remain composed, they will feel more at ease. Make sure to offer them a treat as a reward for their bravery, and don’t forget to reassure them that everything’s okay!
Step 6: Smooth the Edges
Once you’ve finished trimming, you may notice some jagged edges on your dog’s nails. This is where a dog nail file comes in handy. Gently file down the edges of the nails to prevent them from catching on carpets, bedding, or furniture. Filing can also help reduce the likelihood of painful cracks in the nails later on. Just be gentle and patient as you work, and be sure to reward your dog with some treats during the process!
If you don’t have a nail file handy, that’s okay. It’s not always necessary, but it’s a nice finishing touch that can help make your dog’s nails look neat and smooth. Some dogs might even enjoy the filing process if you’ve built a positive association with nail care over time.
Step 7: Repeat Regularly
Consistency is key when it comes to maintaining your dog’s nails. Make nail trimming a regular part of your routine—aim to trim your dog’s nails every 3-4 weeks. By doing this consistently, your dog will get used to the process, and you’ll avoid the issues that come with overgrown nails. Plus, the more often you trim their nails, the easier it will become for both of you!
If your dog isn’t used to nail trimming or if they’re fearful, don’t be discouraged. It may take several sessions to build their confidence. Keep the atmosphere positive, be patient, and remember to reward your dog after each successful trim.
Tips for a Stress-Free Nail Trim
Before we wrap up this section, I’d like to share a few additional tips for making the whole nail trimming experience as stress-free as possible for your dog:
- Stay Calm and Positive: Dogs can pick up on your emotions. If you’re calm, your dog will be calmer too.
- Take Breaks: If your dog gets anxious, take breaks and resume the trimming later. Never rush through the process.
- Desensitize to the Clippers: Let your dog see and sniff the clippers before using them. You can also try running them near their paws without cutting the nails, so they get used to the sensation.
- Reward Your Dog: Positive reinforcement is crucial. Give them a treat and lots of praise after each successful session, and they’ll start associating nail trimming with something positive.
Dealing with Special Cases: What to Do if Your Dog Hates Nail Trimming
Let’s face it, not every dog is going to be thrilled about having their nails trimmed. And that’s okay! As a pet nutritionist and pet care expert, I’ve worked with countless dogs, and I can tell you that many of them initially resist the process. Whether it’s because they’re scared, anxious, or just plain not used to the procedure, it’s important to approach this situation with understanding and patience. If your dog is one of those that absolutely hates nail trimming, don’t get discouraged! Here are some strategies I’ve found helpful in my practice to make the experience smoother for both of you:
Start with Positive Reinforcement
Positive reinforcement is key when it comes to dogs and nail trimming. Start by simply bringing the clippers into the room and giving your dog a treat. Repeat this a few times so that your dog starts to associate the clippers with something pleasant. Gradually, you can begin handling your dog’s paws and rewarding them for allowing you to do so without trimming yet. This builds up a positive connection and will make your dog more tolerant when the time comes to actually trim the nails.
For dogs that are particularly nervous, breaking the task into smaller steps over several days can work wonders. For example, one day, just let your dog see the clippers and reward them for staying calm. The next day, you might touch their paws with the clippers, and so on, until they are completely comfortable with the full process.
Try the “One Nail at a Time” Approach
Sometimes, the sheer thought of trimming all of your dog’s nails in one go can feel overwhelming—for both you and your dog. If your dog is particularly anxious or wiggly, it might be helpful to trim just one nail per session. This way, the experience feels less like a big, scary task and more like a small, manageable goal. Offer a treat and praise after each nail to keep your dog motivated. I’ve worked with many pet owners who found success with this gradual approach, as it reduces the anxiety surrounding the process.
Consider Professional Help for Stubborn Dogs
If your dog’s fear of nail trimming is truly severe and nothing seems to work, it might be time to consider seeking help from a professional groomer or veterinarian. Some dogs just need that extra bit of expertise and calm handling. In cases where a dog has an extreme fear of nail trimming, professional help can also prevent injuries from improper handling or stress-related issues.
Remember that some dogs may also have a fear of the vet or groomer itself, so make sure to choose a professional who is patient and experienced with anxious pets. You might need a few sessions, but eventually, your dog will learn that nail trimming doesn’t have to be a traumatic event.

What to Do If You Cut the Quick (and How to Avoid It)
If you’re nervous about cutting the quick (the sensitive part of the nail), you’re not alone! It’s one of the most common concerns for first-time nail trimmers. While it’s always best to avoid cutting into the quick, accidents can happen—even with the most experienced pet owners. So, here’s what you can do if you do accidentally nick the quick.
Stay Calm and Stop the Bleeding
The first thing you need to do is stay calm. While it may seem like a big deal, in most cases, cutting the quick won’t cause lasting damage. But it will cause some pain and bleeding. Don’t panic; instead, take a deep breath and act quickly to stop the bleeding. If you have styptic powder on hand, apply it immediately to the bleeding nail. This will help clot the blood and stop the flow. If you don’t have styptic powder, cornstarch or a clean cloth can also work as a temporary substitute.
Make sure your dog stays calm as well. Offer them treats or gentle reassurance to keep them from becoming more stressed. Once the bleeding has stopped, continue with the nail trimming if your dog is still okay with it, or take a break and come back to it later.
Preventing Quick Cuts in the Future
The best way to avoid cutting the quick in the future is to take your time and trim small amounts of the nail at a time. With light-colored nails, you can clearly see the quick, but with darker nails, you need to trim more cautiously. In those cases, I recommend cutting off only a tiny bit of the nail at each session, especially if your dog is squirming or uncomfortable. With practice, you’ll become more confident in identifying how much of the nail you can safely trim.
When to Seek Professional Help for Nail Trimming
There are times when it’s best to leave the nail trimming to the professionals. While trimming your dog’s nails at home can save money and create a bonding experience, some situations might require expert care. Here are a few scenarios where you should consider consulting a professional groomer or veterinarian:
- Health Issues: If your dog has health issues that affect their nails, such as infections, tumors, or deformities, it’s best to leave nail trimming to a professional. A veterinarian can assess the situation and ensure the nail trimming process doesn’t worsen any existing conditions.
- Severe Nail Overgrowth: If your dog’s nails are severely overgrown and have started curling or causing pain, you may need a professional groomer who can safely trim them back. In some cases, this might involve trimming the nails under sedation, which should be done under the supervision of a veterinarian.
- Behavioral Issues: If your dog is extremely fearful or aggressive during nail trimming sessions and you’re unable to calm them down, a professional with experience in handling anxious or aggressive dogs may be able to perform the task more safely.
References and Disclaimer
For more information on dog care, pet nutrition, and health advice, be sure to check out resources from trusted veterinary clinics and pet care organizations. I recommend visiting PawPatron for expert insights and tips on pet care that can help you keep your dog happy and healthy.
Disclaimer: The information provided in this article is based on my experience as a pet nutritionist and expert in veterinary clinics. It is for informational purposes only and should not replace professional veterinary advice. Always consult with a veterinarian or certified pet care professional for any concerns regarding your dog’s health or nail trimming.