Safe Ways to Trim a Dog’s Hair at Home: A Complete Guide for Pet Parents
If you’re a dog parent, you know how important it is to keep your pup looking sharp. But when it comes to trimming your dog’s hair at home, things can get a bit tricky! The thought of using scissors or clippers around your pet’s sensitive skin might seem intimidating. But trust me, I’ve been there as a Pet Nutritionist and pet care expert working in veterinary clinics. With a bit of patience, the right tools, and some safety tips, you can give your dog a stylish trim without stepping into the salon. In this guide, I’ll walk you through safe ways to trim a dog’s hair at home. Let’s make grooming at home easier and stress-free for both you and your furry friend!
Why Trim Your Dog’s Hair at Home?
Grooming your dog at home can be a fun bonding experience, and it can save you time and money in the long run. But the benefits don’t stop there! Keeping your dog’s hair trimmed regularly can help maintain their comfort, hygiene, and overall health. As someone who’s worked with pets for years, I’ve seen firsthand how a good trim can prevent matting, reduce shedding, and even help keep your dog cool during warmer months.
Keep Your Dog’s Coat Healthy
Trimming your dog’s hair regularly helps prevent tangles and mats that can be painful for your dog. If your dog has a thick coat, mats can trap dirt and moisture, which may lead to skin infections. By keeping up with regular trims, you ensure your dog’s skin stays healthy and free from irritation.
Save Time and Money
Taking your dog to the groomer can be expensive, especially if your pup requires regular grooming. Grooming at home can be a more cost-effective solution. Plus, you won’t have to wait for an appointment, so you can do the trimming at your convenience, saving you valuable time.
Bonding with Your Dog
Trimming your dog’s hair at home also provides a great opportunity to bond with your pet. Many dogs enjoy spending time with their owners, and a calm grooming session can strengthen the trust between you and your pup. If you’re new to grooming, don’t worry—your dog will likely enjoy the extra attention and care as long as you approach the task with patience and positive reinforcement.
What You Need Before You Start
Before you start trimming your dog’s hair, make sure you have the proper grooming tools on hand. Having the right equipment is key to making the process smoother and safer for both you and your dog. As a pro, I always recommend investing in quality tools. Here’s a quick checklist of what you’ll need:
- Dog Clippers or Scissors: You’ll need clippers or scissors designed specifically for dogs. Avoid using human hair clippers as they can get too hot and cause discomfort for your dog.
- Combs and Brushes: A good brush will help detangle your dog’s hair before you trim it. A comb will help smooth the hair and make it easier to cut.
- Dog Grooming Spray: A light spray can help soften your dog’s hair, making it easier to trim. It also prevents the blades from getting stuck in tangles.
- Styptic Powder: This is essential to have just in case you accidentally nick your dog’s skin. It helps stop bleeding quickly and safely.
- Treats: Don’t forget the treats! Positive reinforcement is key to making your dog feel comfortable during the grooming process.
Grooming Tools in Detail
If you’re wondering which specific tools to choose, let me give you some pointers. When I first started trimming my own dog’s hair, I quickly learned that having the right clippers made all the difference. Choose clippers with adjustable blades to give you control over the trim length. Scissors are great for precision work around sensitive areas like your dog’s face and paws. Make sure the scissors are rounded at the tips to avoid accidental nicks!
Preparing Your Dog for the Trim
Before you even think about picking up those clippers, it’s crucial to prepare your dog for the grooming session. Dogs, especially those who aren’t used to grooming, can get anxious or restless. Here are some steps I’ve learned over the years to help set the stage for a successful trim:
- Calm Your Dog: Make sure your dog is in a relaxed state before starting the trim. Take them for a walk or play with them to burn off some energy. I’ve found that a tired dog is much easier to groom!
- Set Up a Comfortable Area: Choose a well-lit, quiet space where your dog can sit or stand comfortably. A non-slip surface helps your dog feel secure.
- Introduce the Tools: If your dog isn’t familiar with clippers or scissors, take some time to introduce the tools. Let them sniff the clippers, so they don’t get scared by the noise or vibration. I always try to use treats during this step to make it a positive experience.
- Groom Your Dog Regularly: The more you trim your dog’s hair, the easier it will become for both of you. Regular grooming sessions help your dog get used to the process, so don’t wait until your dog’s hair is long and tangled before getting started.
Once you’ve set everything up and your dog is calm and ready, you’re good to go! But remember, trimming a dog’s hair at home requires patience and practice, especially if you’re just getting started.
Step-by-Step Guide to Trimming Your Dog’s Hair
Now that you’re all set up with the right tools and your dog is relaxed and ready, it’s time to dive into the trimming process! As someone who’s spent years helping pet owners with grooming, I can tell you that the key to a successful trim is taking your time and moving carefully. Don’t worry if things don’t go perfectly the first time; practice makes perfect!
1. Start with Brushing
Before you even think about pulling out the clippers, make sure your dog’s coat is free of tangles and mats. Brushing your dog’s hair helps to smooth out any knots, and it also gives you a chance to check for any skin issues that you might need to address. I always recommend using a detangling spray to help with this, especially if your dog’s coat tends to get tangled easily.
As you brush, pay attention to areas like the ears, tail, and underarms, where mats tend to form more quickly. Trust me, the more time you spend on this step, the easier the trimming will be later on. I know it’s tempting to rush, but brushing your dog’s hair thoroughly can make all the difference when it comes to getting a neat, even trim.
2. Choose the Right Length for Your Dog’s Hair
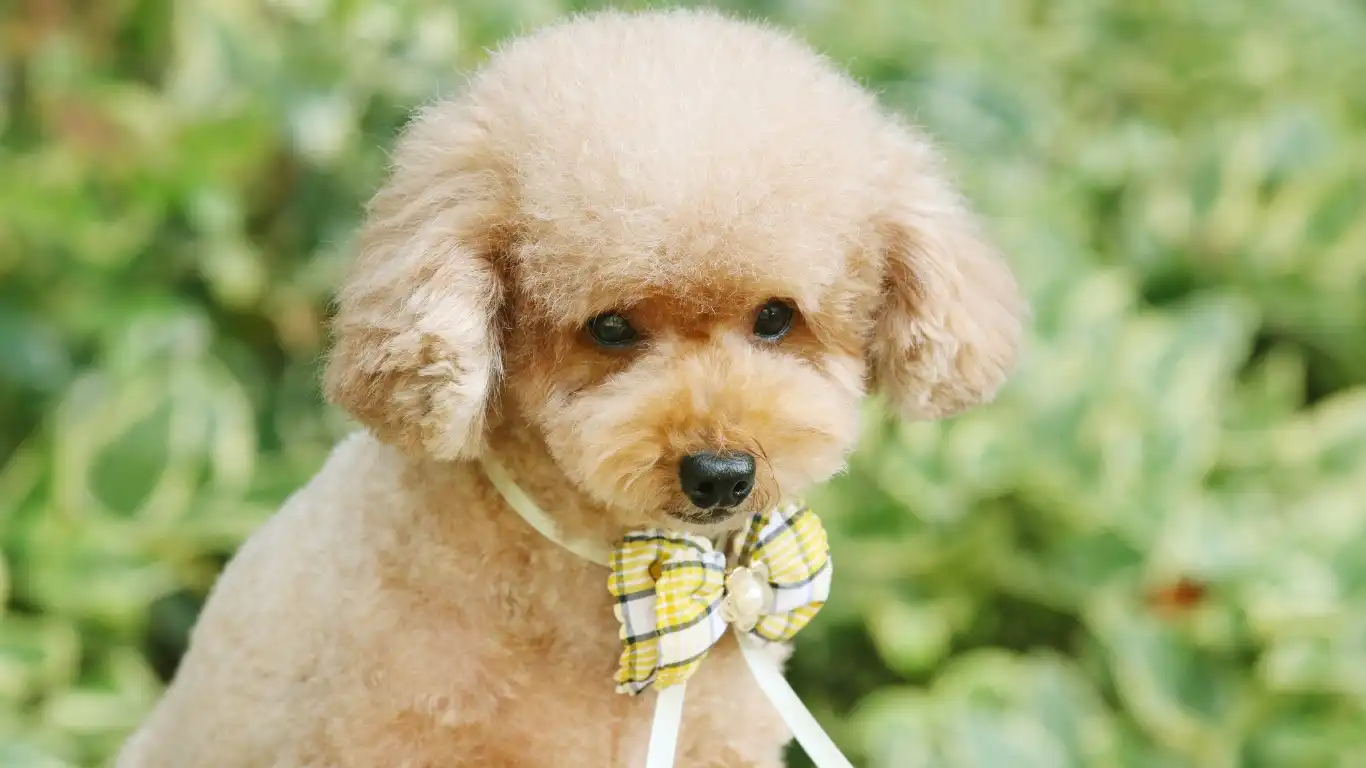
Choosing the right length for your dog’s hair is essential for their comfort and appearance. As someone who’s worked with many different breeds, I’ve learned that there’s no one-size-fits-all answer. It depends on your dog’s breed, coat type, and even lifestyle. For example, some dogs, like Poodles, do best with a shorter, more sculpted trim, while others, like Golden Retrievers, look best with a bit more length for a natural, flowing look.
Take into consideration the seasons too. If you’re trimming your dog’s hair for the summer, it’s generally a good idea to go shorter to help keep them cool. But if you’re preparing for winter, leaving a bit more length can help keep your dog warm. This is something I always tell pet owners when helping them select the best trim for their pup. Just keep in mind that when in doubt, you can always trim a little more, but you can’t put the hair back once it’s cut!
3. Trimming the Body
Now that you’ve brushed your dog’s hair and decided on the right length, it’s time to start trimming. I recommend starting from the body and working your way down to the legs. When using clippers, make sure to use smooth, even strokes, and don’t rush. I’ve found that it’s best to trim in the direction of the hair growth to avoid tugging on your dog’s skin.
If you’re using scissors, be extra careful. I always tell pet owners to trim in small sections and to hold the hair between your fingers to prevent any accidental nicks. It’s important to trim little by little—especially when you’re working near delicate areas like the belly and chest. When trimming around the neck, use shorter strokes to blend in the cut naturally.
4. Trim the Legs and Paws
Next up, let’s work on the legs and paws. This can be tricky if your dog isn’t used to having their paws handled. But don’t worry—patience is key! I always recommend starting by trimming the fur around the paws, then working your way up the legs. You’ll want to make sure you trim the fur between their toes, too, as it can get matted and uncomfortable for your dog. This is an area I’ve had a lot of pet parents struggle with, so I recommend using a clipper guard to ensure you don’t accidentally nick the sensitive skin between their pads.
When trimming your dog’s legs, take your time to make sure everything is even. If you’re not sure, step back and take a look at your progress—sometimes things look different when you’re not so close to them. If you’ve never trimmed your dog’s legs before, start with a longer clipper guard. You can always shorten it, but it’s harder to fix if you trim too much!
5. The Sensitive Areas: Face, Ears, and Tail
The face, ears, and tail are the trickiest parts to trim, so if you’re a first-timer, don’t stress! These areas require extra care and precision. Let me walk you through them step by step.
Face: When trimming around your dog’s face, especially around the eyes, use scissors rather than clippers for more control. Hold the fur away from the skin with your fingers and trim carefully, always working slowly. I’ve found that it helps to have your dog sit or lie down for this part, as it keeps their head steady. If your dog is anxious, try to keep calm and offer a treat after each successful trim to reassure them.
Ears: Be extra cautious around your dog’s ears since they’re sensitive and often covered in long hair that can cause irritation. Use small, rounded-tip scissors to carefully trim any excess fur around the edges. I’ve had many pet parents worry about clipping their dog’s ears too short, but don’t worry—just trim little by little to keep the ear shape intact.
Tail: When trimming the tail, I recommend using scissors, as the tail’s hair can be more delicate and harder to clip evenly with clippers. Trim the fur in the direction of the hair growth, and be sure not to cut too close to the base of the tail. If you want to give the tail a neat appearance, focus on trimming the length of the fur rather than trying to make it too short. The tail is a unique part of your dog’s body, and it’s essential to keep it natural and balanced.
Keep Your Dog Comfortable During the Trim
Throughout the trimming process, it’s essential to keep your dog’s comfort in mind. I always suggest taking breaks if your dog seems anxious or tired. Grooming isn’t a race, and the more relaxed your dog is, the better the final result will be. If you’re not confident in your ability to trim certain areas (like the face or tail), it’s perfectly okay to leave those parts to a professional groomer. There’s no shame in seeking help if needed!
Remember, trimming your dog’s hair at home takes practice, and you’ll get better each time. With patience, the right tools, and some positive reinforcement, you’ll soon be able to give your dog a stylish trim that both you and your pup will love!
Case Studies & Real-Life Examples
In my years of experience as a Pet Nutritionist and pet care expert in veterinary clinics, I’ve seen many pet parents try trimming their dog’s hair at home for the first time. It’s always a mix of excitement and nerves—after all, a dog’s coat is so important for their health and appearance! But let me tell you, I’ve seen some amazing transformations and success stories when owners follow the right steps and take their time.
Case Study 1: A Poodle’s Perfect Trim
One of my most memorable cases was with a first-time dog parent, Sarah, who had a Poodle named Max. Max’s coat was getting matted, and Sarah knew she had to do something, but she didn’t want to take him to the groomer just yet. After showing her how to use the right clippers and giving her a step-by-step guide, Sarah took Max through his first grooming session at home.
What impressed me was Sarah’s patience. She started with small sections of Max’s coat and worked slowly. Max was a bit nervous, but Sarah remained calm and used treats to reward him for his patience. Over the course of a couple of hours, Sarah had transformed Max from a matted mess to a fluffy, fresh-looking pup. It wasn’t perfect, but it was a huge improvement, and Max seemed more comfortable. Sarah’s confidence grew with every trim, and she’s been doing his grooming at home ever since.
Case Study 2: A Golden Retriever’s Summer Trim
Then there was Jack, a Golden Retriever, who needed a summer trim. His thick coat made him too warm during the hotter months, and I suggested trimming him to help keep him cool. Jack’s owner, Mike, was initially a bit apprehensive about trimming his dog’s hair, worried he might cut too much off. We decided to go with a moderate trim and keep the length just long enough to protect Jack’s skin from the sun.
Mike used clippers with a longer guard, and after a few practice strokes, he quickly got the hang of it. By the end of the session, Jack looked refreshed and felt much cooler. Mike was so pleased with the results, and more importantly, Jack seemed happier. I think this case shows that with the right tools and a little guidance, anyone can trim their dog’s hair at home. And it helps to have someone with experience to provide advice when you’re unsure!
Key Takeaways: What You Need to Remember
As you embark on trimming your dog’s hair at home, there are a few key takeaways to keep in mind. These principles will not only help you achieve a great trim but also ensure that the process is safe and enjoyable for both you and your dog.
- Patience is Key: Don’t rush through the process. Your dog will pick up on your energy, and taking your time will lead to a more successful grooming session.
- Choose the Right Tools: Quality tools make a big difference. Invest in clippers and scissors specifically designed for dogs to ensure a clean and safe trim.
- Start Slow: If you’re new to grooming, start with smaller trims and work your way up as you become more comfortable with the process.
- Comfort Comes First: Always prioritize your dog’s comfort. If they’re feeling anxious or tired, take breaks or finish the grooming session later.
- Don’t Overdo It: If you’re unsure about trimming a certain area, it’s okay to leave it to a professional. You can always trim more later, but you can’t put hair back once it’s cut!
FAQs
Q1: How often should I trim my dog’s hair?
It really depends on your dog’s breed and coat type. Dogs with thick coats or curly fur, like Poodles, may need more frequent trims—every 4 to 6 weeks. Dogs with thinner coats might only need a trim every few months. In general, keep an eye on your dog’s coat and trim as needed to prevent mats and tangles.
Q2: Can I use human scissors or clippers to trim my dog’s hair?
It’s not recommended to use human scissors or clippers, as they’re not designed for dog grooming. Human tools can be too sharp, too hot, or just not the right shape for working with your dog’s coat. It’s best to invest in grooming tools specifically made for dogs to avoid any accidents or discomfort.
Q3: What should I do if I accidentally cut my dog?
First, don’t panic! Accidents happen, even to the most experienced groomers. If you nick your dog’s skin, clean the wound gently with warm water, and apply some styptic powder to stop the bleeding. If the cut is more serious, consult your vet for advice. Keeping a calm attitude is crucial so your dog doesn’t become anxious during the situation.
Bonus: Additional Resources or DIY Tips
If you’re ready to dive even deeper into dog grooming, here are some helpful resources and additional tips:
- Watch Grooming Tutorials: There are plenty of great video tutorials online that walk you through the trimming process step by step. Sometimes, seeing the process in action can help you feel more confident.
- Invest in a Grooming Table: While not a necessity, a grooming table can make the process easier, especially for larger dogs. It helps keep them steady and gives you better control during trimming.
- Join Online Pet Care Communities: Whether it’s a Facebook group or a pet care forum, these communities can be a great place to share tips, ask questions, and learn from other pet parents.
Appendix: Table, References, Disclaimer, and Call to Action
Disclaimer: This article is meant to provide general advice based on my years of experience as a pet care professional. However, every dog is different, and it’s always important to tailor grooming practices to your individual pet. If you’re unsure or need specific advice, don’t hesitate to consult your vet or a professional groomer.
Call to Action: Ready to give your dog a fresh, clean trim? Start by gathering the right tools and following the steps in this guide. Your dog will look and feel great, and you’ll both have fun in the process! If you’ve enjoyed this article, be sure to share it with fellow dog lovers and let me know how your dog’s grooming went!